Power scrubber
From DDL Wiki

Contents |
Exectuve Summary
In our preliminary product study of the Black and Decker power scrubber, DFE, DFMA, and FMEA perspectives were all taken into consideration and key findings and recommendations for improvements are summarized below in the executive summary. Mainly, among all aspects, the DFE and DFMA part caught our attention and could use some improvements. Overall, the product is a mostly well-designed product with compact parts and fairly low failure mode effects. Standardized components were chosen for most parts to achieve ease of manufacturing, and metal components had similar dimensions so that simpler manufacturing set up would be required. Some of the parts even served multi-functional purposes, such as the rubber rings. The materials chosen, however, could be further enhanced by taking environmentally friendly materials and manufacturing processes into consideration. Although ABS, the material chosen for most parts in this case, is very easy to work with and is justified by a cost reduction manufacturing purpose, we believe similar materials could be found to reduce environmental impact of the product. In terms of functionality, we identified some major drawbacks of the design such as the pre-defined sponge shape made it difficult to clean certain objects, having to put the scrubber down to rinse objects required extra time, and lastly, the sponge head is not a sustainable solution since it seemed damaged after one use. Preliminary design improvements ideas were discussed and includes designing various shapes sponge heads, adding a rinsing functionality to the product, and even alternating the sponge material so that soap could stay in the sponge for a longer time.
Major Product Stakeholder Analysis
We identified four major categories of stakeholders for our product. They are manufacturers, shipping & transportation companies, retailers, and consumers.
Stakeholder Objectives
Manufacturers
- Low cost raw materials
- Simple manufacturing process required for materials chosen -- easy for mass production
- Energy efficient manufacturing process
- Recyclable materials
- Easy assembly
- Low cost packaging
Shipping & transportation companies
- Firmly packaged
- Light weight packaging
- Space efficient mass packaging
Retailers
- Appearance
- Cost
- Marketability (consumer needs)
- Durability
Consumers
- Overall cost (Price)
- Appearance
- Weight
- Energy use
- Functionality
- Customization
| Needs & Wants | |||||||||
|---|---|---|---|---|---|---|---|---|---|
| Stakeholder | Needs | Wants | |||||||
| Manufacturer |
|
| |||||||
| Shipping & Transportation |
|
| |||||||
| Retailer |
|
| |||||||
| Consumer |
|
| |||||||
Product User Study
Step by Step User Study
Initial Assembly
- Pull out the battery holder at the bottom of the product
- Insert four AA batteries with correct orientations
- Insert the battery holder back
- Attach the desired accessory (pad/brush) with correct alignment to the shaft
 |  |  |
Dish-Washing Procedure
- Press the on/off switch button to turn on the product
- Push the pad/brush against the object being cleaned
- Press the on/off switch button again to turn off the product
- Detach the accessories for cleaning
Observation
We noticed that due to the pre-defined shape of the sponge, sometimes it is difficult for the user to get into the corners of certain objects and depending on the shape of the objects needed to be washed, the sponge appeared to be too short. Also, the user reported that it would be really helpful if the head could bend when needed to accommodate various shapes. Design Ideas: it would be helpful to design various sponge heads that could accommodate all common shapes of dishes such as a thinner, flat one for flat surfaces such as plates, a longer, cylinder shape for dishes such as mugs and cups, and a thicker sponge head with smaller cross sectional area for objects with sharp inner corners etc. Implementing a simple bending mechanism for the collar where the sponge head will be attached was considered. Non-slip material for handle was also considered.
User also indicated that having to put the device down in order to rinse the wash dishes is a drawback. Design Ideas: find a way for user to hold the device on hand while rinsing.
When removing the sponge head after usage,the sponge appeared to be damaged during this process. Design Consideration: alternative ways to attach and replace the sponge heads, especially since we are considering designing various sponge heads.
Excessive soap needed since the sponge that came with the device does not hold soap as well as other sponges could.
 |  |  |
Mechanical Function
The push of a button triggers the electric motor through a circuit board. The motor is connected to a set of planetary gears that reduces the rpm and increases the torque of the motor. A planetary gear is used so the motor and the output shaft are concentric. The planetary gear drives the output shaft that rotates the connector. The connector then rotates and spins the scrubber head. Various amounts of force are applied to the surface of the object manually, according to user preferences. The button is pressed again to turn the motor off.
 |  |
Parts List
Exploded View
The exploded view of the power scrubber after the team has dissambled it. This view displays all of the components.

Bill of Materials
The following is a table of the individual components found in the power scrubber dissection.
| Part Number | Name | Quantity | Mass (g) | Subassembly | Function | Material | Manufacturing Process | Image |
|---|---|---|---|---|---|---|---|---|
| 1 | Sponge | 1 | < 3 | Exchangeable Head | Provides a rough surface for cleaning | Aforementioned Plastic Mesh | Off the Shelf |  |
| 2 | Velcro | 1 | < 3 | Exchangeable Head | Holds the sponge to the device head while allowing users to change the sponge | Nylon | Off the Shelf |  |
| 3 | Device Head | 1 | 14 | Exchangeable Head | A removable device head connecting the sponge and the main device through the connector | ABS | Injection Molding |  |
| 4 | Rubber Ring #1 | 1 | < 3 | Connector | Seals the gadget from water | Rubber | Off the Shelf |  |
| 5 | Connector | 1 | 11 | Connector | Connection point on the device that allows device head switching | PA6/G30 Plastic | Injection Molding |  |
| 6 | Gear Cover | 1 | 6 | Gear Housing | Secures the planetary gear in the gear housing | POM plastic | Injection Molding |  |
| 7 | Output Shaft | 1 | 17 | Gear Housing | Decreases motor speed while increases torque | Steel | Off the Shelf |  |
| 8 | Planet Gear | 6 | < 3 | Gear Housing | Decreases motor speed while increases torque | ABS | Injection Molding |  |
| 9 | Sun Gear | 1 | 15 | Gear Housing | Decreases motor speed while increases torque | Steel | Off the Shelf |  |
| 10 | Gear Housing with Ring Gear | 1 | 20 | Gear Housing | Housing that holds the planetary gear while aligning the motor with the gear | ABS | Injection Molding |  |
| 11 | Gear on Motor | 1 | < 3 | Motor Housing | Gear connecting the motor and the planetary gear | Steel | Off the Shelf |  |
| 12 | Motor | 1 | 60 | Motor Housing | Provides rotating action of the device | Multiple | Off the Shelf |  |
| 13 | Motor Housing | 1 | 3 | Motor Housing | Secures the motor to two conducting copper pieces | ABS | Injection Molding |  |
| 14 | Conductor #1 | 2 | < 3 | Motor Housing | Extends the electrical connection copper on the motor | Copper | Sheet Stamping and Bending |  |
| 15 | Pin | 2 | < 3 | Finishing Assembly | Secures the interior subassemblies to the outer shell | Steel | Extruding |  |
| 16 | Outer Shell | 1 | 71 | Finishing Assembly | Secures interior subassemblies, provides waterproofing, and providing grip for the users | ABS, Rubber | Injection Molding |  |
| 17 | Screw | 2 | < 3 | Circuit Board | Secures the circuit board to its housing and secures the circuit board housing to the outer shell | Steel | Off the Shelf |  |
| 18 | Circuit Board | 1 | < 3 | Circuit Board | Provides electrical input control | Multiple | Off the Shelf |  |
| 19 | Circuit Board Housing | 1 | 6 | Circuit Board | Secures the circuit board and the button to the outer shell | ABS | Injection Molding |  |
| 20 | Button | 1 | < 3 | Circuit Board | Turns the device On/Off | Plastic | Off the Shelf |  |
| 21 | Conductor #2 | 1 | < 3 | Battery Housing | Allows electricity to conduct from the battery housing to the circuit board | Nickel Plated Copper | Sheet Stamping and Bending |  |
| 22 | Battery Housing #1 | 1 | 7 | Battery Housing | Holdes the battery and conductors in place | ABS | Injection Molding |  |
| 23 | Conductor #3 | 1 | < 3 | Battery Housing | Connects the battery in series | Nickel Plated Copper | Sheet Stamping and Bending |  |
| 24 | Conductor #4 | 1 | < 3 | Battery Housing | Connects the battery in series | Nickel Plated Copper | Sheet Stamping and Bending |  |
| 25 | Clicker | 1 | < 3 | Battery Housing | Holds the battery housing in the outer shell | Nickel Plated Copper | Sheet Stamping and Bending |  |
| 26 | Battery Housing #2 | 1 | 20 | Battery Housing | Holdes the battery and conductors in place | ABS | Injection Molding |  |
| 27 | Conductor #5 | 2 | < 3 | Battery Housing | Connects the battery in series | Nickel Plated Copper | Sheet Stamping and Bending |  |
| 28 | Handle | 1 | < 3 | Battery Housing | Provides a handle for users to pull the battery housing out of the outer shell | Steel | Extruding and Bending |  |
| 29 | Rubber Ring #2 | 1 | < 3 | Battery Housing | Provides seal for waterproof, provides friction and holds the battery housing to the outer shell | Rubber | Off the Shelf |  |
| 30 | Rubber Ring #3 | 1 | < 3 | Connector | Provides seal for waterproof | Rubber | Off the Shelf |  |
Design For Manufacturing and Assembly
DFMA is a tool for analyzing design decision for manufacturing and assembly. A list of guidelines are provided for the tendency of reducing complexity and cost of the product.
DFM
The product uses standardized components for many of the components such as the screws, motor, and Velcro, etc. For the ease of manufacturing, all the conducting metal pieces have similar dimensions; this means that fewer tools and setups are required during the manufacturing process. Most of the other customized parts are made of the same material, ABS, which are easy to work with using injection molding for mass production. Furthermore, since injection moldings are used for the ABS parts, not many finishing operations are needed to further reduce cost. The product uses the rubber rings as a multifunctional part what work as a seal for water proof as well as a locking mechanism for holding parts together. The rubber rings also help avoid tight tolerances based on its flexibility, which result in cost reduction. For the outer shell, special process of injecting two materials at once, rubber and ABS, is used to waterproof the device and eliminate extra works for assembly.
There are also rooms for improvement. The product is composed of many small pieces in the interior of the device that have complicated shapes. Also, although injecting molding can account for irregular shape, those small pieces can be modified into simpler shapes without losing their functionalities. The battery holder can be considered to be bought off the shelf and integrate with the product with minor design changes. The product uses soldering for connecting the motor to the conducting metals; however, it might be less cost and time consuming if the conducting piece can be redesign to secure the connection.
Overall, the design choices are made well for consideration of manufacturing. Limited materials are used for the components, they are chosen to be easily fabricated, and most of them do not require secondary and finishing operations. Although injecting molding can be expensive, the product is mass produced, which cut down the cost for every extra part produced. On the other hand, it may be possible to reduce the numbers of parts by combining subassembly into one component, which can make the design simpler. It is also important to consider the cost of using special process property as oppose to assembling after the parts are manufactured.
DFA
The product only requires two pins and two screws in the whole assemble and the outer shell only consists of one piece. One example of eliminating the use of screws in assembling is the snapping mechanism used for closing the gearbox. Another example is using rubber as a way to lock the battery housing in place. The product consists multiple subassemblies, such as the battery housing, the circuit board, and the motor/gear set. Each component is designed in certain shapes to prevent mistakes in assembly orientation. The way the circuit board subassembly comes in contact with the motor subassembly is one example. The assembly directions are minimized to two and components either go in from top or bottom. The openings also have different shapes to help recognizing what goes where. Furthermore, the outer shell is not only roomy but also provides guides on the interior wall for subassemblies to slide and fit in easily.
Besides the fact that the product requires very little screws and pins, there are unnecessary parts that can be removed from the assembly. The connecting part between the device head and the output shaft (part number 5) can possibly be part of the device head. Also, the clipping metal piece on the battery house (part number 25) seems to be functionless due to the existence of the rubber ring. It might also be possible to reduce gears with different selection of motor. To further reduce the use of screws and pins, a snap fit can be used to secure the interior assemblies in place instead of using pins.
Overall, the product is easy to assemble and limited tools are required to accomplish. The only assembly process that requires more resources are press fitting the pins and soldering the motor to the conducting metal. Improvements on those two assemblies can be done by using other methods. All the subassemblies are easily to go and fit into the out shell, either from the top or from the bottom. Most parts are unique and there is little to no confusion when assembling the part back together. However, there are also unnecessary parts that can be eliminated to simplify the assembly even more.
Failure Mode and Effect Analysis
An RPN number that is above 100 signifies a part of the the product that requires the most attention. However, in the case of the power scrubber, the RPNs have not exceeded 100; therefore, the issues with the power scrubber are fairly mild in danger. The greatest RPN number seen by the scrubber is 40. The aspect of the scrubber that yields this RPN or requires the most attention is the high chance of fracturing the shell of the scrubber; hence, dropping the mechanism seems to be the greatest risk of failure for the power scrubber. As a result, this may be the component of the scrubber that the group decides to reform to make the product less prone to fractures.
| Item and Function | Failure Mode | Effects of Failure | S | Causes of Failure | O | Design Controls | D | RPN | Recommended Actions |
|---|---|---|---|---|---|---|---|---|---|
| Battery Housing | Battery housing comes loose | No Power Source | 4 | Not closing properly | 4 | Scrubber would not turn on | 2 | 32 | A better clicking mechanism |
| Button: ON/OFF | Button sticks | Can't turn on or can't turn off | 4 | Alignment of button | 2 | Scrubber would not turn on | 1 | 8 | Make it a flip switch |
| Outer Shell | Cracking | No longer water proof | 4 | Dropping, crushing, overheating | 5 | Scrubber would not turn on | 2 | 40 | Coat entire body with rubber |
| Rubber gripping/waterproofing | Melts or wear and tear | No longer waterproof | 3 | Heat | 2 | Scrubber would not turn on | 3 | 18 | Better material choice |
| Motor-circuit board connection | Welding of copper loosens | Motor does not run | 4 | Fatigue, Overheating | 1 | Scrubber would not turn on | 3 | 18 | Better mesh of the motor with the circuit board |
Design For Environment
Design for environment focuses on the environmentally friendliness of the product and assess the environmental friendliness through inspecting the amount of GHG (Greenhouse Gases) emission generated during production and use of the product. Below is a table listing the GHG emissions generated during the manufacturing process of the product itself and manufacturing of some major complimentary products consumed during the product use phase of the power scrubber.
DFE Assessment
| DFE Guidelines | Good Aspects of Competitor Product | Ideas for Improvement |
|---|---|---|
| New Concept Development |
|
|
| Select Low Impact Materials |
|
|
| Reduce Material Amount |
|
|
| Eco-Friendly Manufacturing |
|
|
| Optimize Distribution |
|
|
| Reduce Use-Phase Impact |
|
|
| Maximize The First Life |
|
|
| Reduce End-of-Use Impact |
|
|
This product was poorly designed for the environment. Although the product uses lightweight packaging and uses ideal manufacturing techniques, there are not many strides towards make an eco-friendly design. Simple ways to improve the product without changing the design include the use of rechargeable batteries rather than disposable ones, delivery of the product to stores in bulk, and a redesign of product packaging. If you change the frame of reference for the design, then you can make large improvements on the environmental aspects. The focus should be placed on redesigning the product to cut back on complimentary products, improve energy efficiency, and increase the use of recycled and reusable materials.
EIO-LCA Summary
| Production | Use | ||||||||||
|---|---|---|---|---|---|---|---|---|---|---|---|
| Item purchased | Power Scrubber Manufacturing | Battery | Sponge | Soap | Water | ||||||
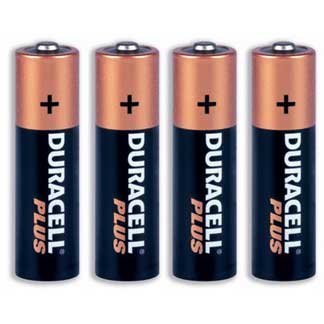
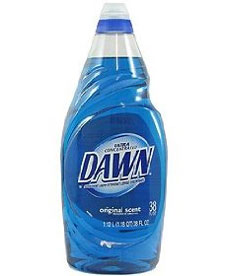
| (a) Picture | |  |  |  |  | ||||||
| (b) Economic Sector Name and # | Small Electric appliance #335210 | Primary battery manufacturing #335912 | Broom, brush, and mop manufacturing #339994 | Soap and cleaning compound manufacturing #325610 | Water, sewage and other systems #221300 | ||||||
| (c) Reference Unit | 1 item | 4 batteries | 1 piece | 16 oz/bottle | 19.5 gallon/day | ||||||
| (d) Units Consumed per Product Life | 1 | 30 | 60 | 60 | 18255 | ||||||
| (e) Cost per Unit(2002) | $ 16.00 | $ 8 | $ 1.60 | $ 4 | $ 0.0293 | ||||||
| (f) Lifetime Cost = (d)*(e) | $ 16.00 | $ 240 | $ 96 | $ 240 | $ 53.38 | ||||||
| (g) Economy-wide mtCO2e Released per $1M of Output for Sector(b) | 463 | 422 | 519 | 569 | 1780 | ||||||
| (h) Implied mtCO2e Released per Product Life = (g)*(f)/$1M | 0.00741 | 0.101 | 0.00498 | 0.137 | 0.0950 | ||||||
| (i) CO2 Tax @ $30/mtCO2e = $30*(h) | $ 0.222 | $ 3.04 | $ 1.49 | $ 4.10 | $ 2.85 | ||||||
| (j) Assumptions | 5 years product life | A set of batteries lasts for 2 months. | A sponge lasts for 1 month. | Average household consumes 1 bottle of soap per month. | Dish washing takes 15 minutes per day. | ||||||
Production


Use of Soap


Drawing conclusion from this table, the battery and soap use aspects dominate the product's life cycle GHG emissions. Our team has looked into the possibility of using a less intensive motor to reduce electricity use and an alternative material for the sponge in order to achieve soap-conserving dish washing. Overall, the cost of a power scrubber with the CO2 tax enforced would be $11.70 in addition to the product life time cost itself. Although this is not a large amount, comparing to the plain product cost of $16 and the total life time product cost of $645.38, this 1.81% additional cost becomes less significant and is not likely to have serious impact on product sales. However, the soap and batteries usage is often neglected during the product use process since most consumers would not consider soap use related to the product and batteries use has a longer time period and therefore is easy to be neglected as well.
Looking at the percentage break-down pie chart of the GHG emissions, it is not surprising that the sector that dominates GHG emissions is power generation for small electronics. As power generation yields the most GHG emissions for most consumer products. However, it is interesting to note that the actual manufacturing process has a fairly minor impact on the overall GHG emissions. Out of 463mtCO2e for the product, small electrical appliance manufacturing only contributed 10.5 mtCO2e. This means that in order to achieve improvements from a DFE perspective, efforts should be focused around reducing the energy raw materials take for the power scrubber.
Moreover, the GHG emissions produced during the soap manufacturing process is significant and should be taken into consideration. As indicated in the table, the CO2e tax caused by the soap use during product use is calculated to be much larger than the CO2e tax caused by the manufacturing process of the scrubber itself. Thus, we concluded that soap use reduction should be a priority in redesign.
The Team

Team Leader: Xin (Pam) Hu
DFMA Leader: Ken-Soh (Robert) Mai
FMEA Leader: Ben Antoine
DFE Leader: Kelle Patterson
User Study Leader: Shao-Chuan (Ted) Fang
References
Carnegie Mellon University Green Design Institute. (2008) Economic Input-Output Life Cycle Assessment (EIO-LCA), US 1997 Industry Benchmark model. <http://www.eiolca.net>
Dieter, George E., and Linda C. Schmidt. Engineering Design. 4th Edition. New York, NY: McGraw-Hill, 2009. 707-715. Print.
Images:
http://zitotalking.files.wordpress.com/2010/08/duracell-plus-aa-batteries-4-pack1.jpg
http://bloombikeshop.com/images/products/dawndishsoap225.jpg
http://blog.naseeb.com/wp-content/uploads/2010/12/image-80-tap-water.gif
