Impulse sprinkler
From DDL Wiki
(→Design for Manufacture and Assembly (DFMA)) |
(→Design for Assembly) |
||
| Line 396: | Line 396: | ||
Easy visual shape/control | Easy visual shape/control | ||
No screws | No screws | ||
| - | |The | + | |The two rotational springs are a bit difficult to put in place |
|- | |- | ||
|'''Minimize Fasteners''' | |'''Minimize Fasteners''' | ||
Revision as of 17:38, 1 February 2014
Contents |
Executive Summary
Stakeholder Needs
- What does the user need?
- The user needs it to be easy to set up. It has to be easy to screw in to a hose without a bunch of water leakage.
- There has to be easy to follow instructions.
- It has to be portable, so that people with larger gardens can easily move it around.
- It has to be durable since sometimes people just leave it in their yard.
- It has to be reliable because the water distribution should be uniform.
- It has to be able to water the lawn effectively while minimizing the amount of water that ends up on the sidewalk or driveway.
- It has to work well with different water pressures.
- It has to be easy to clean and maintain.
- What does the retailer need?
- Inexpensive to produce and therefore inexpensive to acquire (since it is plastic instead of metal).
- Lightweight so it is easy to ship.
- Easy to explain to customers.
- Durable, so customers will not need warranty replacements or repairs
- Compatibility with various mounts from various manufacturers
- What does the manufacturer need?
- Inexpensive to purchase materials
- Inexpensive to create the pieces from the materials
- Simple assembly to keep assembly costs down
- Made of nontoxic materials (or have few toxic wastes) to save costs in preventative measures to protect workers
- Design capable of having schematics clear enough for foremen to understand what needs to be made
- Finished product not need to be maintained in any way to keep storage costs down while waiting for transport
- What does the transporter need?
- Durable enough to not break during rough handling
- Light enough to not over encumber people or vehicles in the transportation sector
- Compact enough to fit plenty into small spaces (maybe they interlock to be smaller and fit more in trucks or boxes)
- Be able to withstand a variable range of temperatures likely to be experienced in transit
- Inexpensive so that should they be broken in transit, there is less monetary loss
- What does the product have?
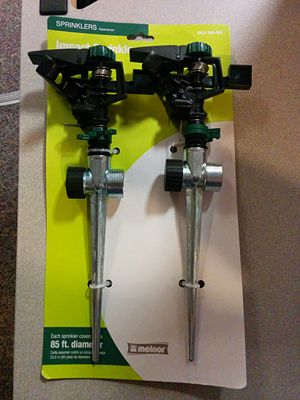
- The product is easy to set up. All the user has to do is attach the sprinkler to the stake and put the stake in the ground and attach a hose
- It can be adjusted to cover 360° or to just spray a specific region.
- It has a sturdy build, but it has some plastic parts that may be prone to damage
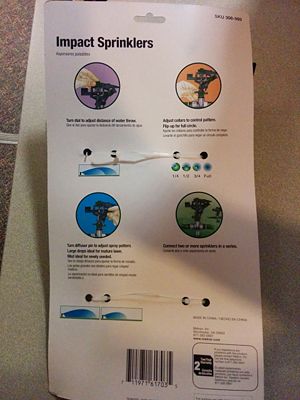
- It has maintenance and cleaning instructions included in the packaging.
- Comments/Observations
A stake is not always required since some places are equipped with an underground pipe system which the sprinkler can be directly screwed into.. The maintenance instructions are easy to follow; furthermore, there is a clever color code: all the things that need to be adjusted are in green.
Steps to using the product
Step 1: Removing from packaging
The sprinkler is tied into a cardboard sheet using plastic ties, which are easily cut.
Step 2: Make adjustments
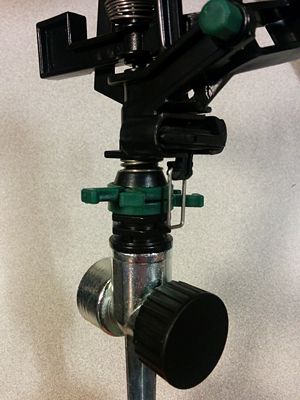
The sprinkler head can be adjusted for the spray made, by using the built in deflector at the top or adjusting the diffusion of the spray. Furthermore, the plastic tabs at the bottom can be used to determine the angle of the spray, and can be restricted to a straight line or opened up to a 360° distribution.
Step 3:Stick the stake into the ground
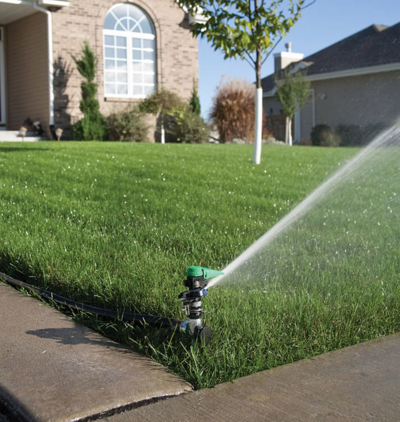
Make sure the stake is deep enough that the water pressure won’t displace the sprinkler(picture from Amazon[2] since we couldn't actually test it because of the weather)
Step 4: Turn on Water Flow
Attach a hose to the open end on the stake, and turn on the water. The water pressure can be adjusted from the hose to affect the spray distance, as well as the knob on the top of the sprinkler
How the Product Works Mechanically
The water coming out of the nozzle goes into a S-shaped pipe from which the water goes out in the same direction it went in, but further to the left, allowing a higher torque to be generated. The reactive force to this torque is given by the acceleration of the inertia mass, such that the main frame remains almost immobile. When it then comes back toward the frame because of the spring and hits it, it gives its momentum to the main frame, which rotates a bit. But as it hits the frame, some water goes into the S-shaped pipe and the process begins again. If the spray arc is set to a 360 degree rotation, this rotation will continue indefinitely. However, if the spray arc is set to a limited range of motion, the metal bracket will trip on the clip after a few rotations, which will raise the interrupter. The interrupter stops the arm from rotating, so the force imparted to the S-shaped pipe is transferred back to the arm, and the rotation is reversed. While the first set of rotations described is choppy, with a small displacement each time the arm hits the main frame, this rotation is continuous. Eventually, the sprinkler will rotate back to its original position, where the metal bracket will hit the clip and lower the interrupter, and the process starts all over.
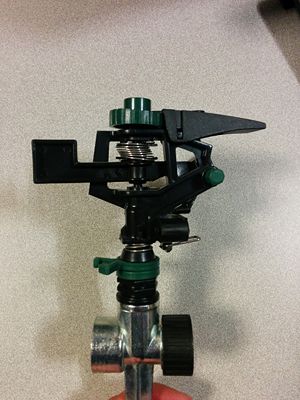
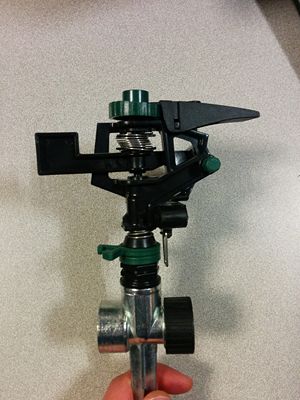
There are three different settings of the water spray that user input can affect. The first is how diffuse the spray is. The diffusion of the spray is controlled by the diffuser pin, which is the green screw seen in the picture above. If the screw is screwed in all the way, the water stream from the nozzle will hit the screw, causing the spray to diffuse. If the screw is unscrewed, the water stream will be uninterrupted, providing a more focused flow of water.
The second setting that can be adjusted is the distance of the spray. This is affected by the green adjuster knob at the top, which controls the slope of the distance adjuster. The water stream from the nozzle, after potentially hitting the diffuser pin, the hits the distance adjuster. At low distance settings, the distance adjuster is flatter, causing the water stream to deflect off it at a lower angle, and reducing the distance of the spray. At high distance settings, the distance adjuster becomes steeper, causing the water stream to come off at a higher angle, and increasing the distance of the spray.
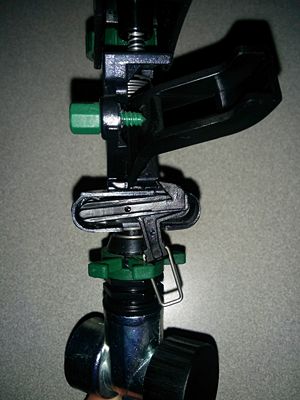
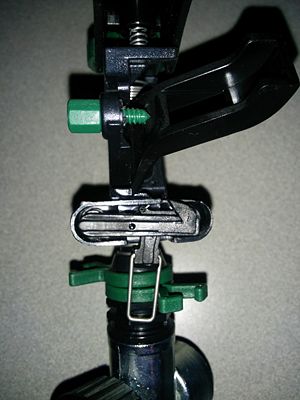
The third setting that can be adjusted by the user is the angle of the spray, with two different modes. The two different modes (360 continuous/back and forth) are selected thanks to a lever, which can put a small plastic piece up or down each times it hits the metal parts setting the limits. When this piece of plastic is down, then the inertia mass will hit the main frame on it way back, pushing it counter-clockwise; when it is down, the inertia mass will hit the main frame before, just after being moved by the water going out of the s-shaped pipe, pushing it clockwise. That way you can go back and forth between two limits.
Videos testing a very similar model, from Rain Bird; between 04:00 and 05:30 on YouTube [3] Snapshots:
Part List
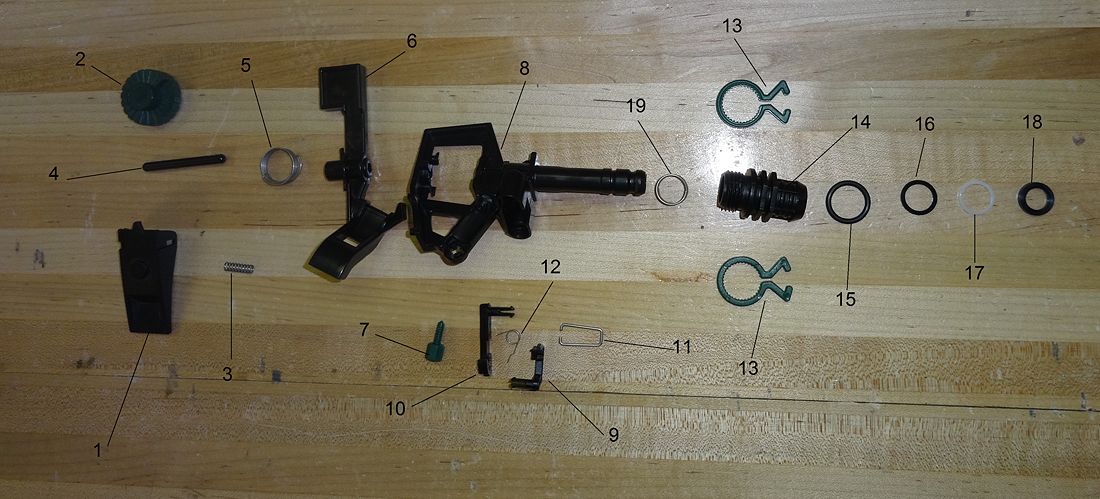
The impulse sprinkler examined consists of 19 parts, with 10 pieces being manufactured and 9 purchased off the shelf. The 10 manufactured pieces were all made of plastic, and produced via injection mold, while the off the shelf pieces consisted of 1 metal bracket, 4 metal springs, 3 rubber o-rings, and 1 Teflon ring. Part 13 (Clip), was used twice in the assembly, while each other part was used only once. There were no sub-assemblies identified in the product. The four parts that had to do with user adjustable settings were colored green, while all other plastic parts were made black.
Exploded view
Bill of materials
| Part Number | Name | Quantity | Mass (g) | Function | Material | Manufacturing Process | Image |
|---|---|---|---|---|---|---|---|
| 1 | Distance Adjuster | 1 | 5 | Adjusts distance of water stream | Plastic | Injection | |
| 2 | High Adjuster Knob | 1 | 3 | Adjust the slope of part 1 | Plastic | Injection | |
| 3 | Axial Spring 1 | 1 | <1 | Keeps part 1 up | Metal | Off the shelf | |
| 4 | Axle | 1 | <1 | Allows the arm to rotate in the main frame | Plastic | Injection | |
| 5 | Torsional Spring 1 | 1 | 1 | Brings the arm back towards the main frame | Metal | Off the shelf | |
| 6 | Arm | 1 | 13 | Inertia wheel/ Moves when hit by water and rotates the whole sprinkler when hit the frame | Plastic | Injection | |
| 7 | Screw | 1 | <1 | Disperses the water stream | Plastic | Injection | |
| 8 | Main Frame | 1 | 21 | Base of the assembly that all parts attach to; also has a hollow section for water flow. | Plastic | Injection | |
| 9 | Actuator | 1 | <1 | Triggers the direction lock | Plastic | Injection | |
| 10 | Interrupter | 1 | 1 | Changes the direction of rotation of the sprinkler | Plastic | Injection | |
| 11 | Metal Bracket | 1 | <1 | Hits the clips when it should change the direction of rotation and transmit the force to the actuator | Metal | Off the shelf | |
| 12 | Axial Spring 2 | 1 | <1 | Push down the mount to prevent leakage | Metal | Off the shelf | |
| 13 | Clips | 2 | 1.5 | Determine the range of motion | Plastic | Injection | |
| 14 | Mount | 1 | 6 | Connect to the hose and allows the frame to rotate | Plastic | Injection | |
| 15 | O-Ring 1 | 1 | <1 | Prevent leakage | Rubber | Off the shelf | |
| 16 | O-Ring 2 | 1 | <1 | Prevent leakage | Rubber | Off the shelf | |
| 17 | Ring | 1 | <1 | Allows the frame to rotate inside the mount by reducing friction | Teflon | Off the shelf | |
| 18 | O-Ring 3 | 1 | <1 | Holds the frame inside the mount and prevent leakage | Rubber | Off the shelf | |
| 19 | Torsional Spring 2 | 1 | <1 | Connects part 9 and 10 as an unstable triggering system | Metal | Off the shelf |
Design for Manufacture and Assembly (DFMA)
Design for Manufacturing
| Guideline | Properties in accordance with the guideline | Properties to improve |
|---|---|---|
| Minimize Part Count | The actuator & interruptor have clips
The axel is just jammed into the main frame The frame is injected in one piece | The spring of the height adjuster could be integrated (plastic)
There are many O-rings and a spring for the mount; could sue an other fixation method |
| Standarize Components | Springs, O-rings and clips are standarized
Sprinkler mount is standarized across different gardening tools | Could use off-the-shelf components for the diffuser screw and clips |
| Commonize Product Line | No specialized skills required to produce
→ mostly injection molded → don't need parts from other factories | |
| Standarize Design Features | Mount has standarized screw in | Uses a lot of different types of O-rings |
| Keep Designs Simple | Only three main pieces (frame, arm and mount) | |
| Multifonctional Parts | Arm diffuse spray & turns | Combine diffuser screw & height adjuster |
| Ease of fabrication | Everything is in plastic, injected | |
| Avoid High Tolerances | There is almost no tight tolerances needed | |
| Minimize Secondary & Finishing Operations | None! Settings are made by user | |
| Take advantage of Special Process Properties | Adjustable parts are green (color in injection molding) |
Design for Assembly
Numerous points (minimize Part Count, etc...) come both in DFM and DFA, so we will just add properties specific to the assembly in this table:
| Guideline | Properties in accordance with the guideline | Properties to improve |
|---|---|---|
| Mistake-Proof | Each part has a defined function and is unique (but for the two clips)
Frame is a single part Easy visual shape/control No screws | The two rotational springs are a bit difficult to put in place |
| Minimize Fasteners | Actuator/interrupter snap fits
Clips Height adjuster snap fits Axle is pressed in | Mount system couls be simplified |
| Minimize Handling | Everything is built around a central axis
Everything can be done with bare hands, except for actuator/interruptor/spring system (but with very basic tools) | |
| Minimize Assembly Direction | Fill things into the frame | The actuator/interruptor system is not along this main axis |
| Provide Unobstructed Access | All parts can be seen, no hidden subassemblies | |
| Features in your product that have no functionality in the use phase but are there instead to support assembly | Mount hub spring |
Failure Mode and Effects Analysis (FMEA)
Design for the Environment (DFE)
Team Roles
Team Leader:
DFMA Lead: Louis Dufour
FMEA Lead: William Bullard
DFE Lead:
Report Lead:
Citations
[1] Home Depot Customer Reviews
[3] Impact Sprinklers Performance Review - Vigoro Vs. Rain Bird, by user Miguel Chavez

