Grass trimmer
From DDL Wiki
(→Design for the Environment) |
(→Design for the Environment) |
||
| Line 130: | Line 130: | ||
[[Image:DFE_Table_2.PNG|center]] | [[Image:DFE_Table_2.PNG|center]] | ||
| + | |||
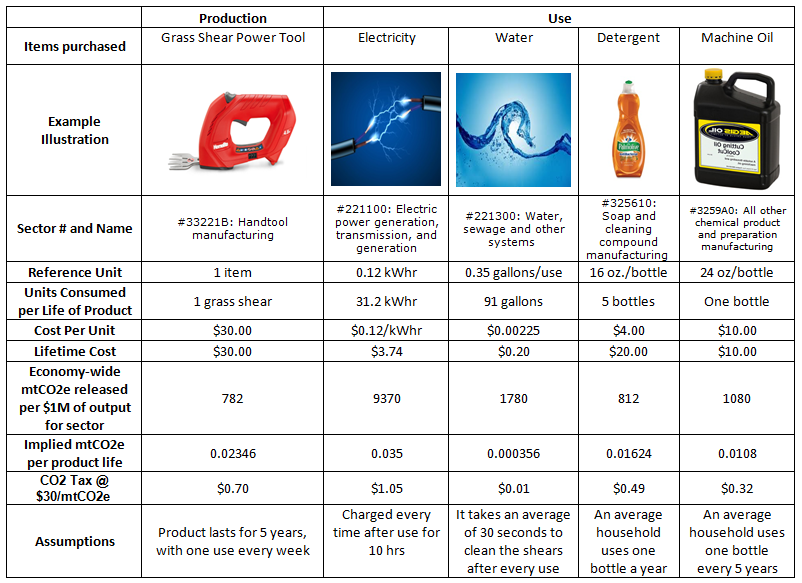
| + | Looking at the above table it can be seen that the largest impact is made by the electrical power generation. This is most likely due to the needed 10 hour long charge after every use of the product. | ||
Revision as of 16:23, 2 February 2014
Contents |
Executive Summary
check check check
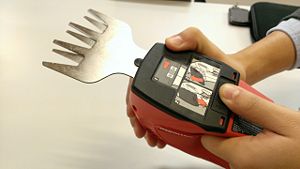
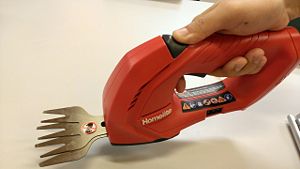
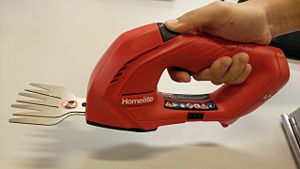
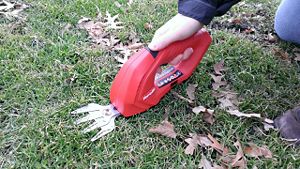
Electric grass shears are a small, hand-held device which trim grass using oscillating blades. They are commonly used to trim the edge of a lawn, along a garden, or other places that a mower cannot reach. Electric grass shears offer an alternative to both string trimmers (aka weed whackers or weed eaters) and hand shears – all for cutting edges of lawns so they look nice and well-kept.
This report contains a detailed analysis of the use and design of Homelite electric grass shears, purchased for $30 from Home Depot. From our own use of the product, comments from existing users, and online reviews we found that from a user’s perspective the electric grass shears are overall very effective in trimming grass but have limited battery life (which also degrades over time), require the user to pull the trigger constantly during use as a safety feature (which can be half an hour or more), blades jam in thick grass, and blades dull over time.
findings from dfma, dfe, fmea
After analyzing how the product is used and problems with the current design, we have the following recommendations for improvement:
- Use a removable battery so that the user can switch to another fully charged battery if other is completely discharged
Major Stakeholders
Manufacturers
- Low cost materials, parts, and manufacturing equipment
- Minimal assembly labor
- Reliable supply chain
Distributors
- Compact packaging to reduce shipping costs
- Lightweight to reduce shipping and material handling costs
- Durable to prevent damage during product shipping
Retailers
- Compact packaging to reduce shelf-space costs
- Aesthetically pleasing packaging and product to draw customer interest
- Good quality and performance to prevent returns and improve customer loyalty
End Users
- Function as expected – trim grass effectively and efficiently
- Reliable and long product life-time
- Safety features to prevent harm to user during use (very important since sharp, oscillating blades are on product)
- Easy to use
- Battery life to last user’s duration of grass trimming
- Ergonomic to prevent harm and injury to user’s hand
- Lightweight to prevent excessive strain on user’s muscles
- Compact for portability and small storage space
- Reasonable recharge time
- Easy to maintain
- Aesthetically pleasing
Use Study
Steps for Use
Initial Assembly
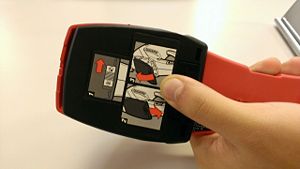
1. Connect charger to grass trimmer and let charge for 10 hours
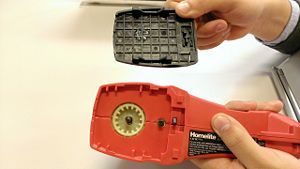
2. Open the black bottom cover
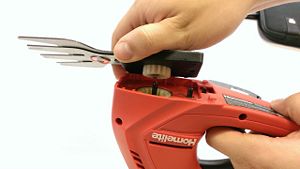
3. Insert blades into latch
4. Close by sliding in black bottom cover
5. Slide the locking switch
Grass Trimming
1. Hold down the lock down button
2. Press the switch trigger
3. Bending down and holding the trimmer parallel to the ground, slide the trimmer over the grass
4. Let go of both the trigger and the lock down button to power off
Our Experience Using Product
The grass shears came in a rectangular, cardboard box. The box was plain and contained no padding. Included in the box were:
- Main shears assembly
- Attachable cutting blades
- User manual
- Charging unit.
Removing contents from the packaging was simple. The parts were all in working order; there was no visible damage.
The battery came in a very low (nearly uncharged) state. The instruction manual advised charging overnight, or at least 10 hours. The instruction manual also stated that the charger should be removed when the shears are fully charged. Unfortunately, the shears have no battery charge indicator. This is a fairly simple indicator, which is included on many consumer items. The lack of an indicator on this product is unfortunate. We charged the shears and began assembly. The only assembly required was the insertion of the cutting blades into the main assembly. We then began product testing.
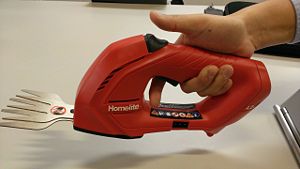
The product is operated using a two-button mechanism- meaning, two buttons must be depressed, simultaneously, in order to actuate the cutting blades. The buttons are located at the top and bottom of the shear handle. This is a safety feature, used to avoid accidental operation of the cutting mechanism.
The product was used to cut moderately high grass, bushes and thin branches. The product cut through all three media, with ease. The largest branch tested was about 1/4” in diameter. Cutting of thicker branches may be feasible, but it not tested in this study. When cutting taller grass, it was harder to see the work that the shears were doing, because the cut grass fell on top of the shears and impeded view.
The battery life was tested by running continuously (not cutting any grass) and was found to be 25 minutes. The manufacturers claimed that the device would last for 1 to 2 hours which may be correct depending on how often the device is switched on an off.
Overall, the product accomplishes the job for which it was built- cutting grass and light brush, with precision. The price ($30) seems reasonable for the level of performance provided.
Other Customers' Experience Using Product
After discussing the product with customers who have used the product and reading online reviews, we have found that customers are generally satisfied with the performance of electric grass shears (in general, not restricted to the specific product analyzed in this report). They thought it functioned well and found it easy to use. However, were dissatisfied with its battery life, having to pull the trigger constantly during use, occasional jamming, blade dulling, and limited ability to cut thick and wet grass. Users consistently compared the product to its alternatives because the product is not a must-have - it is a nice-to-have. Compared to string trimmers, electric grass shears are more precise, less expensive, quieter, more compact, lighter, easier to use, and do not throw grass into gardens, but cannot cut as thick grass. Compared to hand shears, they are less strenuous for the user's hands and easier to use, but more expensive and require more storage space.
Electric grass shears also come in two other variants: Some are sold with long poles so that the user can stand while using the device (user gets less precision but is more comfortable). Others are sold with an additional attachment to replace the grass blades with hedge blades for trimming hedges and bushes.
Mechanical Function
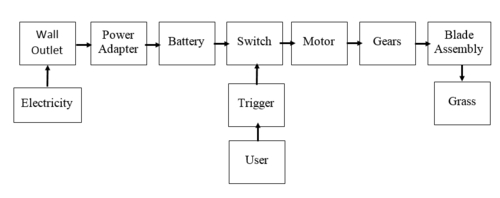
The device uses a rechargeable battery to provide power to a motor. Recharging the device is accomplished by plugging the device into a wall outlet via a power adapter. When the user deactivates the safety and pulls the trigger, a switch supplies power to the motor. The motor in turn rotates a gear set. The gear shaft connects to a link mechanism that rotates one of the blades back and forth relative to the other (using a rotating cam in a slot).
Design for Manufacturing and Assembly
The following charts show our findings of the DFMA guidelines of the grass trimmer. Cost looks to be the most important factor of this design. This product looks to be designed to be able to be mass produced.
Manufacturing
Many component were injection molded plastics and it seems like most of the components which were not injection molded were outsourced. There were also many standardized components. The main flaw with this design is the overall shape of the design. Right now the housing is very bulky with a high mass. The main body of housing is in the shape of a rectangle with most of the components in the upper (handle) and left (motor/blades) of the housing. This could be reduced in both mass and size by moving all components to the upper and left of the housing and removing the housing material from the other two sides making an “L” shape.
Assembly
Assembly of this product could be done fairly easy by attaching most of the components directly to the housing and connecting the housing. This would most likely be done in an assembly line. Connection of the housing looks to be the most difficult part of the assembly however as it requires fitting two housing pieces together, each with multiple components attached, and then tightening several screws to complete assembly. This could be fixed by having all components attached to one side of the housing and by having the housing component attach to one another via snap fits.
Design for the Environment
When designing for the environment, the main focus is to design a product that is environmentally friendly. The environmentally friendliness of a product is measured by the amount of greenhouse gases emitted during production and during the use of the product.
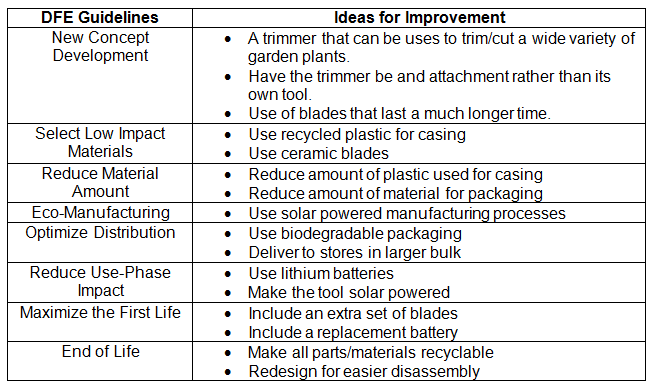
Looking at this product closely, it can be seen that environmental friendliness wasn’t priority during the design process. By putting environmental friendliness as the priority during a redesign, large strides can be made to make this product have less of an impact, such as using lithium ion batteries rather than the nickel-cadmium ones currently being used, and to use less plastic when making the shell/casing.
Looking at the above table it can be seen that the largest impact is made by the electrical power generation. This is most likely due to the needed 10 hour long charge after every use of the product.
Failure Modes & Effects Analysis (FMEA)
"Failure Modes and Effects Analysis (FMEA) is a failure analysis system often utilized to examine possible failure modes within a system for classification by failure mode, severity, likelihood and detection of the modes of failure."
After analyzing the different failure modes, we have concluded that this product has a very low failure risks and therefore low risk of harm to the user. This is due to the simplicity of the design and that our product is strictly mechanical; electrical connections would most likely add more failure modes to the product. On the other hand, this product deals with high air pressure situations so it is also a delicate instrument which comes with delicate parts. The connection valve has the most parts and therefore the most chances of failing when being used. At the same time, a lot of failures may occur due to the high air pressure which is invisible to the user.
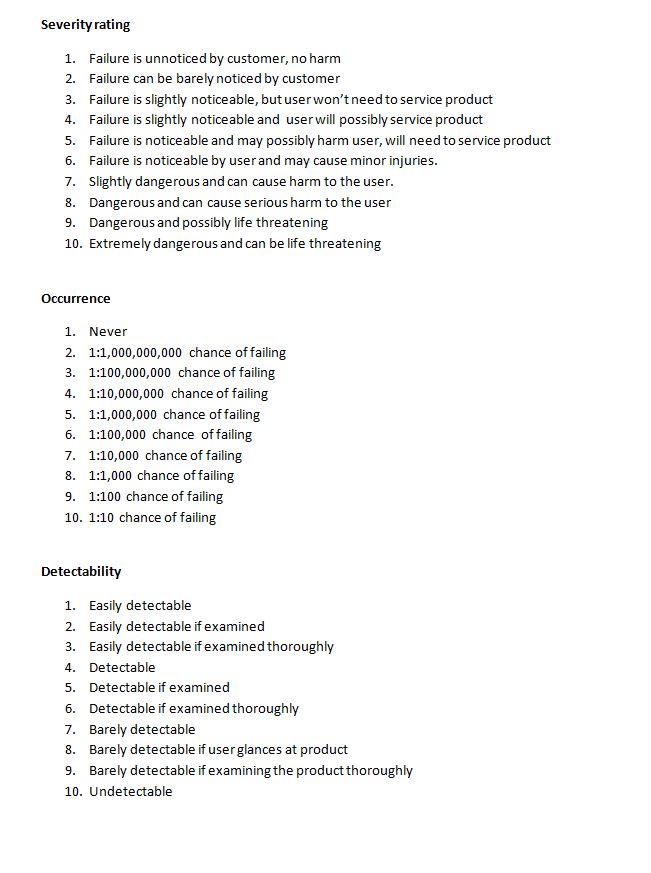
The following is the scale that we have utilized to study the possible effects and failure modes of our product.
| Failure Modes and Effects Analysis - Floor Bike Pump | |||||||||
|---|---|---|---|---|---|---|---|---|---|
| Item & Function | Failure Mode | Effects of Failure | S | Causes of Failure | O | Design Controls | D | RPN | Recommended Actions |
| Blade Assembly | Blades jam | Temporary or permanent loss of function | 5 | Particulate trapped between blades;Bending of blades due to misuse | 7 | Better blade lubrication; Tighter tolerances on blade seperation | 2 | 70 | ? |
| Does not lock | No air transfer into wheel | 3 | User not using it correctly | 2 | Check if it locks | 3 | 18 | Something that does not use a lock, Make it easier to lock | |
| Valve may not fit | No air transfer into wheel | 1 | Wrong valve type | 4 | Check if it locks | 4 | 16 | Make a universal valve, Provide adapters | |
| Pressure Gauge | Air leaking out of wheel | Won't display pressure | 2 | Broken gauge | 1 | Test in manufacturing plant | 2 | 4 | Better pressure gauge tube seal, Different pressure reading technique |
| Incorrectly calibrated | Displays incorrect pressure reading | 2 | Dropping gauge, Manufacturing error | 1 | Test in manufacturing plant | 7 | 14 | -- | |
| Handle rod | Bends | Can not apply downward force, Breaks rod | 5 | Bars are physically bent forward and not down, Damaged, Improper use | 2 | -- | 7 | 70 | Stronger rod |
| Tube | Air leaking out of wheel | Loss of air from tire | 3 | Misuse, Damage | 3 | -- | 4 | 36 | Tube wrapped in durable material |
Team Roles
Team roles list
Appendix
Appendix with tables
| Design for Manufacturing Guidelines | ||
|---|---|---|
| Design Objectives | Strengths | Weakness |
| Minimize Part Count |
|
|
| Standardize Components | Row 2, column 2 | Row 2, column 3 |
| Commonize Product Line | Row 2, column 2 | Row 2, column 3 |
| Standardize Design Features | Row 2, column 2 | Row 2, column 3 |
| Keep Designs Simple | Row 2, column 2 | Row 2, column 3 |
| Multifunctional Parts | Row 2, column 2 | Row 2, column 3 |
| Ease of Fabrication | Row 2, column 2 | Row 2, column 3 |
| Avoid Tight Tolerances | Row 2, column 2 | Row 2, column 3 |
| Minimize Secondary & Finishing Operations | Row 2, column 2 | Row 2, column 3 |
| Take advantage of Special Process Properties | Row 2, column 2 | Row 2, column 3 |
References
List of references for this wiki
![Figure 1: Electric Grass Shears Dissected and Analyzed [homelite.com]](/ddl/images/thumb/Homelite_grass_shears.jpg/500px-Homelite_grass_shears.jpg)
