Ceiling-mounted bicycle lift

From DDL Wiki

Revision as of 16:12, 6 February 2007 by RusselVerbofsky (Talk | contribs)
Jump to: navigation, search

Contents

Analysis of the Current Product

Pre-Dissection Opportunities:

- Better Directions

- All needed parts included

- Cost

- Lifts more objects than bikes

- Interchangable lifting mechanisms

- Hold more wieght

- Crank to lift bike

Customer needs, product requirements

Davey

Explanation of how system functions

Russ and Jeff

After purchase, the first step in using the Ceiling Mounted Bicycle Lift is to install the system in the desired location. A set of instructions is included with the product. However, after reviewing the instructions, we determined that they contain many errors and may confuse the user if they were to follow the directions exactly. Therefore, we have developed the following setup procedure to describe the way a generally knowledgeable user may install it without using the given instructions.

Setup:

1.) Open box and unpack all parts making sure everything has been included.

2.) Measure distance between the back of the seat and the front of the handle bars on the bike that will be used.

3.) Transfer this measurement to the wood board and draw a line resembling the front of the handle bars and a line for the back of the bike.

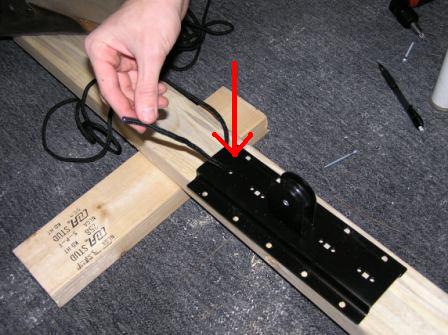
4.) Tie one end of the rope into a double knot. Pull the other end through the square hole on the end of the cieling bracket that has one pulley.

Image:Design07_Team1_Directions_Pic_4.JPG

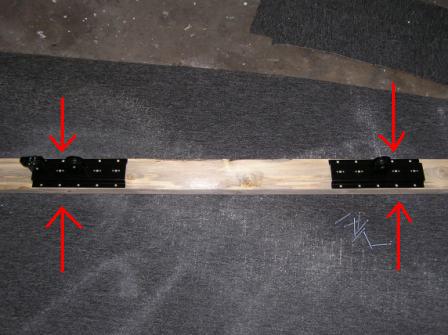
4.) Set the two black brackets on the board so that the the hole between the two pulleys on the bracket with two pulleys and the second hole in on the bracket with one pulley show the lines.

Image:Design07_Team1_Directions_Pic_5.JPG

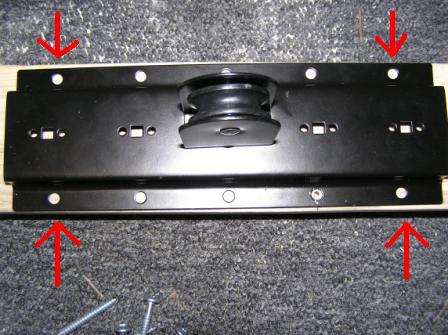
5.) Pre-drill 1/8" pilot holes into the wood where the corner circular holes are in the bracket.

Image:Design07_Team1_Directions_Pic_6.JPG

6.) Screw the wood screws through the corner circular holes on the brackets and into the wood board securing the brackets to the board. (Picture Shown)

7.)

8.)Using wood screws, mount the wooden board to the ceiling in desired location. Be sure to screw into the joists of the ceiling. Screwing into drywall only or ceiling tiles only will not provide an adequate hold.


Use:

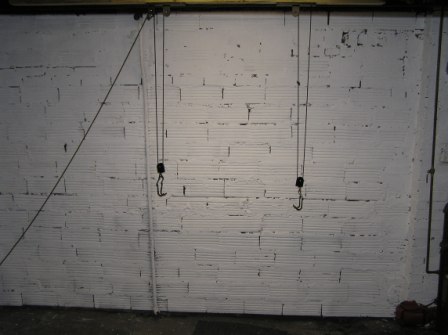
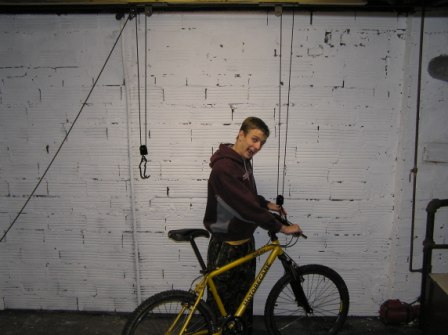
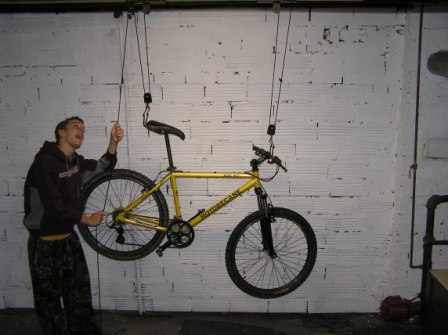
1.) Insure that the bike lift is secured to the ceiling and that the ropes and pulleys are in proper placement. Lower the pulleys so that they are low enough to easily place the front and back of the bike on.

Image:Design07_Team1_Russisanidiot01.JPG

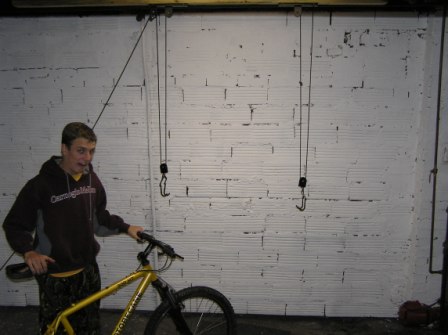
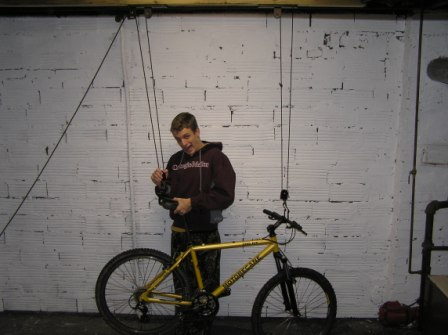
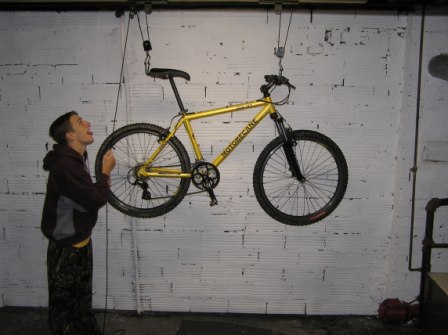
2.)Roll the bike up to the bike lift and hold it so that the handle bars are next to one set of hooks and the back of the seat or next to the other set of hooks.

Image:Design07_Team1_Russisanidiot02.JPG

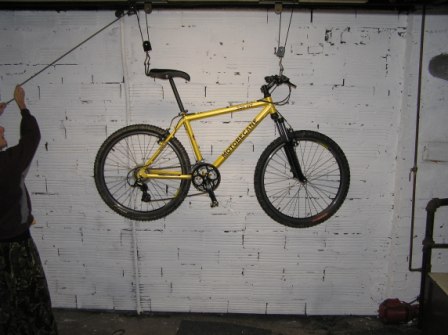
3.)Place the front hooks under the handlebars and make sure that they are secure enough to hold the bike.

Image:Design07_Team1_Russisanidiot03.JPG

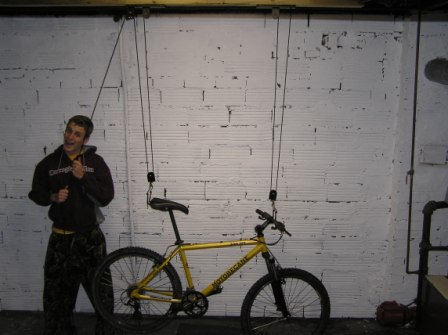
4.)Place the back hooks under the back of the seat and make sure that they are secure enough to hold the bike.

Image:Design07_Team1_Russisanidiot04.JPG

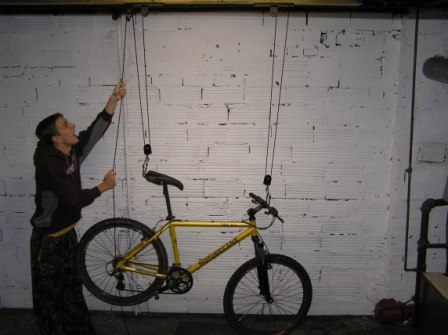
5.)Untie the rope from the wall mount and start to pull it straight down. The bike should start to lift up from the ground. If the bike seems unstable or starts to slip stop immediately and make sure your setup is correct.

Image:Design07_Team1_Russisanidiot05.JPG

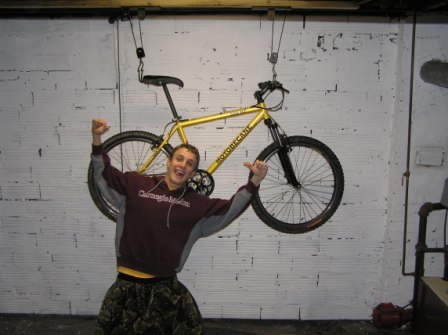
6.)One hand at a time, while holding the rope with the other hand, keep reach up and pull the rope down.

Image:Design07_Team1_Russisanidiot06.JPG


Image:Design07_Team1_Russisanidiot07.JPG


Image:Design07_Team1_Russisanidiot08.JPG


Image:Design07_Team1_Russisanidiot09.JPG


Image:Design07_Team1_Russisanidiot10.JPG

Pictures of the disassembly and label all components, function of each component

– Russ and Jeff

Part # Part name QTY Function Wt.(oz.) Image
001 Bracket Washer 5 Distributes force applied by bracket bolt <.1
002 Bracket Nut 5 Secures bracket bolt to mount .1
003 Bracket Bolt 5 Connects two brackets with washer and nut .1
004 Hook Washer 4 Distrubutes force applied by hook bolt <.1
Error creating thumbnail: convert: unable to open image `/ux0/websites/wiki.ece.cmu.edu/wiki/virtual-hosts/ddl/images/Team_A_Hook_Washer.jpg': No such file or directory @ error/blob.c/OpenBlob/2882.
convert: no images defined `/ux0/websites/wiki.ece.cmu.edu/wiki/virtual-hosts/ddl/images/thumb/Team_A_Hook_Washer.jpg/100px-Team_A_Hook_Washer.jpg' @ error/convert.c/ConvertImageCommand/3235.
005 Hook Nut 4 Secures hook bolt with washer and nut .1
Error creating thumbnail: convert: unable to open image `/ux0/websites/wiki.ece.cmu.edu/wiki/virtual-hosts/ddl/images/Team_A_Hook_Nut.jpg': No such file or directory @ error/blob.c/OpenBlob/2882.
convert: no images defined `/ux0/websites/wiki.ece.cmu.edu/wiki/virtual-hosts/ddl/images/thumb/Team_A_Hook_Nut.jpg/100px-Team_A_Hook_Nut.jpg' @ error/convert.c/ConvertImageCommand/3235.
006 Hook Bolt 4 Connects bracket to hook with washer and nut .1
Error creating thumbnail: convert: unable to open image `/ux0/websites/wiki.ece.cmu.edu/wiki/virtual-hosts/ddl/images/Team_A_Hook_Bolt.jpg': No such file or directory @ error/blob.c/OpenBlob/2882.
convert: no images defined `/ux0/websites/wiki.ece.cmu.edu/wiki/virtual-hosts/ddl/images/thumb/Team_A_Hook_Bolt.jpg/100px-Team_A_Hook_Bolt.jpg' @ error/convert.c/ConvertImageCommand/3235.
007 Ceiling Bracket 2 Secures and connects brackets and pulleys to ceiling with screws 7.4
Error creating thumbnail: convert: unable to open image `/ux0/websites/wiki.ece.cmu.edu/wiki/virtual-hosts/ddl/images/Team_A_Ceiling_Bracket_3.jpg': No such file or directory @ error/blob.c/OpenBlob/2882.
convert: no images defined `/ux0/websites/wiki.ece.cmu.edu/wiki/virtual-hosts/ddl/images/thumb/Team_A_Ceiling_Bracket_3.jpg/100px-Team_A_Ceiling_Bracket_3.jpg' @ error/convert.c/ConvertImageCommand/3235.
008 Hook 4 Connects bike to lift 1.5
Error creating thumbnail: convert: unable to open image `/ux0/websites/wiki.ece.cmu.edu/wiki/virtual-hosts/ddl/images/Team_A_Hook_1.jpg': No such file or directory @ error/blob.c/OpenBlob/2882.
convert: no images defined `/ux0/websites/wiki.ece.cmu.edu/wiki/virtual-hosts/ddl/images/thumb/Team_A_Hook_1.jpg/100px-Team_A_Hook_1.jpg' @ error/convert.c/ConvertImageCommand/3235.

Error creating thumbnail: convert: unable to open image `/ux0/websites/wiki.ece.cmu.edu/wiki/virtual-hosts/ddl/images/Team_A_Hook_2.jpg': No such file or directory @ error/blob.c/OpenBlob/2882.
convert: no images defined `/ux0/websites/wiki.ece.cmu.edu/wiki/virtual-hosts/ddl/images/thumb/Team_A_Hook_2.jpg/100px-Team_A_Hook_2.jpg' @ error/convert.c/ConvertImageCommand/3235.
009 V-Bracket 2 Connects hooks to u-pulley mount 1.5
Error creating thumbnail: convert: unable to open image `/ux0/websites/wiki.ece.cmu.edu/wiki/virtual-hosts/ddl/images/Team_A_V_Bracket.jpg': No such file or directory @ error/blob.c/OpenBlob/2882.
convert: no images defined `/ux0/websites/wiki.ece.cmu.edu/wiki/virtual-hosts/ddl/images/thumb/Team_A_V_Bracket.jpg/100px-Team_A_V_Bracket.jpg' @ error/convert.c/ConvertImageCommand/3235.
010 U-Pulley Mount 4 Houses pulley assembly, Connects brackets to rope and ceiling bracket #
011 48' Rope 1 Secures bike and pulleys using wall rope tie 6.5
Error creating thumbnail: convert: unable to open image `/ux0/websites/wiki.ece.cmu.edu/wiki/virtual-hosts/ddl/images/Team_A_Rope.jpg': No such file or directory @ error/blob.c/OpenBlob/2882.
convert: no images defined `/ux0/websites/wiki.ece.cmu.edu/wiki/virtual-hosts/ddl/images/thumb/Team_A_Rope.jpg/100px-Team_A_Rope.jpg' @ error/convert.c/ConvertImageCommand/3235.
012 Wall Rope Tie 1 Ties rope to wall and stores excess rope 2.1
Error creating thumbnail: convert: unable to open image `/ux0/websites/wiki.ece.cmu.edu/wiki/virtual-hosts/ddl/images/Team_A_Wall_Rope_Tie_1.jpg': No such file or directory @ error/blob.c/OpenBlob/2882.
convert: no images defined `/ux0/websites/wiki.ece.cmu.edu/wiki/virtual-hosts/ddl/images/thumb/Team_A_Wall_Rope_Tie_1.jpg/100px-Team_A_Wall_Rope_Tie_1.jpg' @ error/convert.c/ConvertImageCommand/3235.

Error creating thumbnail: convert: unable to open image `/ux0/websites/wiki.ece.cmu.edu/wiki/virtual-hosts/ddl/images/Team_A_Wall_Rope_Tie_2.jpg': No such file or directory @ error/blob.c/OpenBlob/2882.
convert: no images defined `/ux0/websites/wiki.ece.cmu.edu/wiki/virtual-hosts/ddl/images/thumb/Team_A_Wall_Rope_Tie_2.jpg/100px-Team_A_Wall_Rope_Tie_2.jpg' @ error/convert.c/ConvertImageCommand/3235.
013 Pulley 5 Provides mechanical advantage in lifting bike #
014 Rivet 7 Connects pulleys and l-clutches to mount #
015 Locking Pulley Mount 1 Houses pulley assembly with clutch #
016 Large L-Clutch 1 Prevents rope from slipping during lowering process #
017 Small L-Clutch 1 Prevents rope from slipping #
018 Ceiling Screw 10 Secures ceiling bracket to ceiling .2
Error creating thumbnail: convert: unable to open image `/ux0/websites/wiki.ece.cmu.edu/wiki/virtual-hosts/ddl/images/Team_A_Ceiling_Screw.jpg': No such file or directory @ error/blob.c/OpenBlob/2882.
convert: no images defined `/ux0/websites/wiki.ece.cmu.edu/wiki/virtual-hosts/ddl/images/thumb/Team_A_Ceiling_Screw.jpg/100px-Team_A_Ceiling_Screw.jpg' @ error/convert.c/ConvertImageCommand/3235.


Component Weight (oz)
U-Pulley + Rivet + Pulley 3.8
Clutch Pulley Mount + 3 Rivets + Pulley + Large L-Clutch + Small L-Clutch 4.8

Likely manufacturing processes for all components

- Kevin (incorporate into section above)

DFMA, FMEA, DFE

–Kevin
Personal tools