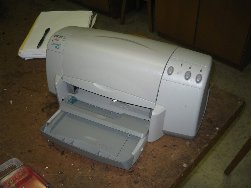
Inkjet printer
From DDL Wiki
(Added description for pic 19.) |
(Added description for pic 20.) |
||
| Line 127: | Line 127: | ||
<br />20. | <br />20. | ||
[[Image:Printer003.jpg|500px]] | [[Image:Printer003.jpg|500px]] | ||
| + | <br />'''User Input Buttons''' | ||
| + | <br />'''Cancel Button:''' The left-most button is the "Cancel" button. It cancels the current print job. | ||
| + | <br />'''Paper Feed Button:''' The middle button is the "Paper Feed" button. This button feeds through any paper that has stopped part way in the rollers. It also must be pressed to reset a print job if there was a paper jam in the middle. | ||
| + | <br />'''Power Button:''' The right-most button is the "Power" button. It does just what it says, it turns the power on or off. It is not a "hard" switch though (i.e. it won't turn the printer off without feeding any paper through the rollers first or returning the print cartridges to their docking position). | ||
<br />21. | <br />21. | ||
[[Image:Printer002.jpg|500px]] | [[Image:Printer002.jpg|500px]] | ||
| + | |||
<br />22. | <br />22. | ||
Revision as of 02:30, 2 February 2007
Sample Project Study
Function
1. To print images in color or black&white or gray-scale on certain sizes of paper
2. To print images on a variety types of paper that have a certain softness level
Inputs/Outputs
Input
  1. Paper
  2. CPU data
Output
1. Printed paper
Use
1. Place Printer on a flat surface
2. Plug in Parallel port to CPU
3. Plug in Power Cord to outlet
4. Install Printer Drivers
5. Insert Ink
6. Insert material to be printed
7. Upload Image desired from CPU to Printer
8. Remove Printer Image (End Product)
Different User
1. Computer illiterated
2. People who want to print images on special materials that are not bendable
3. Physically Disabled/Elderly
Other Stakeholders
1. Printer/Paper/Ink/Others Manufacturer
2. Providers of Raw Materials
3. Retail Stores
4. Transportation workers
Product Dissection
2.
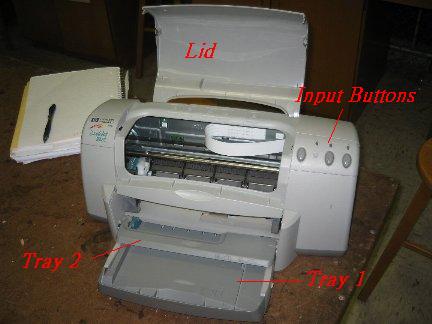
Lid/Paper Tray 1/ Paper Tray 2/ Input Buttons
Lid: prevents dust, allows ink replacement & paper adjustment
Paper Tray 1: holds pre-printed paper in straight position
Paper Tray 2: holds printed paper
Input Buttons: lets users input basic commands
Design Potential: *none
3.
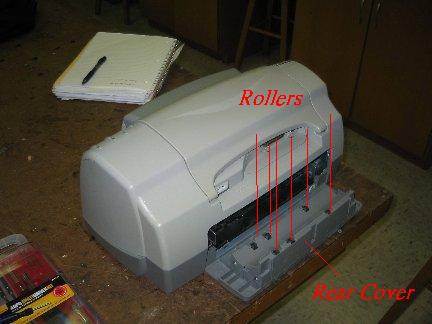
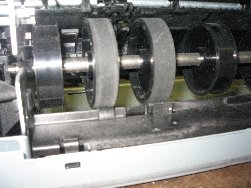
Rear Cover
Rear Cover: The 6 rollers located on it assist the paper movement inside of the printer
Design Potential: It might be one of the potential location for our rear slot (for CD or other hard materials).
4.
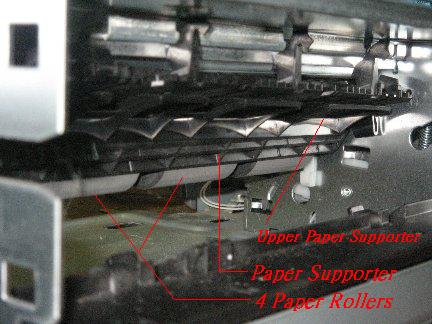
17.
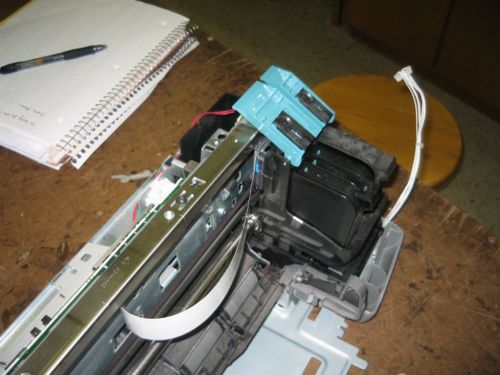
Print Cartridges
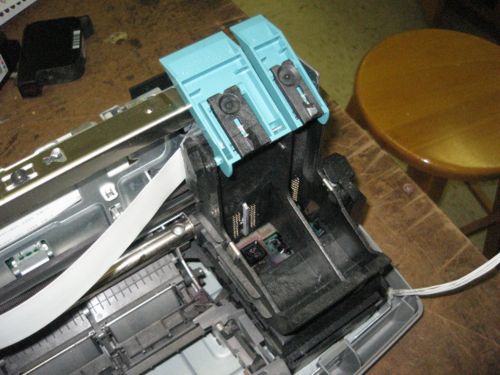
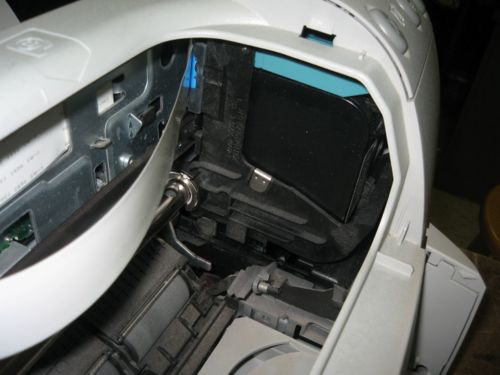
Print Cartridges: These cartridges hold the ink and the jets which place the ink on the paper.
Print Cartridge Slots: The slots which hold the cartridges can be seen in this view. The aqua-colored tabs at the top flip down to secure the cartridges in the slots.
Main Vertical Support: The main vertical support can be seen in this picture. It is a metal plate that is secured between two other supports which are in-turn stamped into the base plate. The support is the metal bar that comes up from the bottom left.
User Input Wires: The white bundle of wires at the right of the picture is the connection to the buttons on the top cover of the printer.
Design Potential: *none
18.
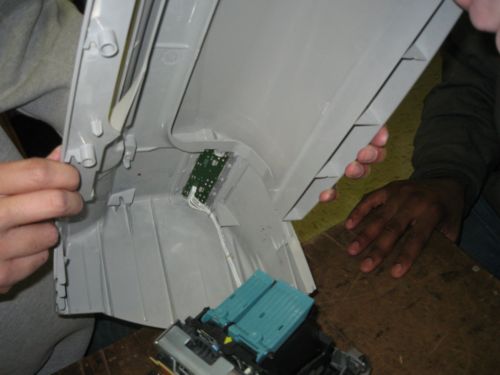
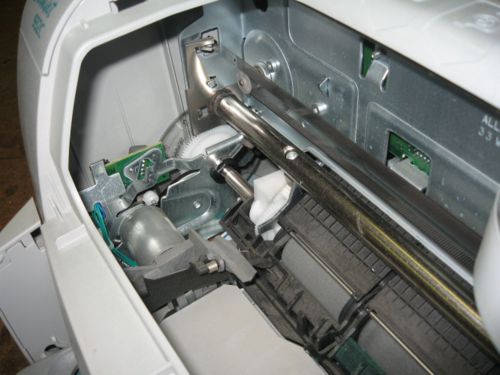
Inside of Top Cover
Print Cartridge Slots: The tabs which hold the print cartridges in can be seen in the locked position here.
User Input Wires: The white bundle of wires which was unplugged in the previous picture can be seen here plugged into the circuit board containing the user interface buttons.
Design Potential: *none
19.
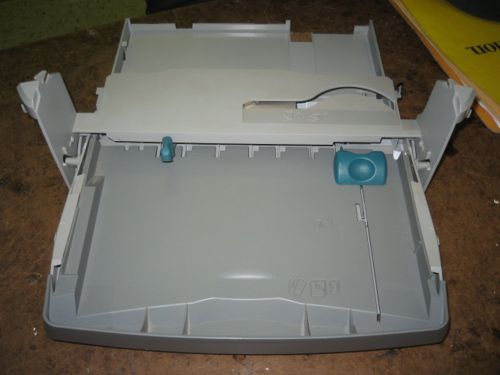
Paper Tray
Paper Tray: This tray holds the paper before and after it has been printed. The lower section holds blank paper ready to be printed, the upper tray holds the paper after it has gone through the rollers and been printed on.
Letter Feed: The slot in the top tray can be used to feed envelopes and other irregularly sized paper into the rollers.
Paper Placement Tabs: The two aqua tabs are used to keep the paper stacked neatly and in place for the rollers. These tabs can be moved in or out depending on what size paper is put into the tray.
Design Potential: *none
20.
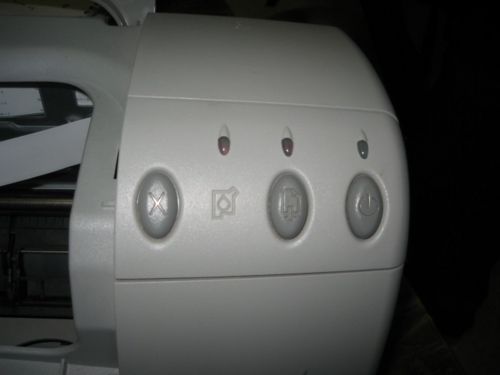
User Input Buttons
Cancel Button: The left-most button is the "Cancel" button. It cancels the current print job.
Paper Feed Button: The middle button is the "Paper Feed" button. This button feeds through any paper that has stopped part way in the rollers. It also must be pressed to reset a print job if there was a paper jam in the middle.
Power Button: The right-most button is the "Power" button. It does just what it says, it turns the power on or off. It is not a "hard" switch though (i.e. it won't turn the printer off without feeding any paper through the rollers first or returning the print cartridges to their docking position).
23.
| Error creating thumbnail: convert: unable to open image `/ux0/websites/wiki.ece.cmu.edu/wiki/virtual-hosts/ddl/images/IMG_2032.jpg': No such file or directory @ error/blob.c/OpenBlob/2882. convert: no images defined `/ux0/websites/wiki.ece.cmu.edu/wiki/virtual-hosts/ddl/images/thumb/IMG_2032.jpg/500px-IMG_2032.jpg' @ error/convert.c/ConvertImageCommand/3235. |
