Paper shredder
From DDL Wiki
(→Functional Operation:) |
(→Functional Operation:) |
||
| Line 72: | Line 72: | ||
==Functional Operation:== | ==Functional Operation:== | ||
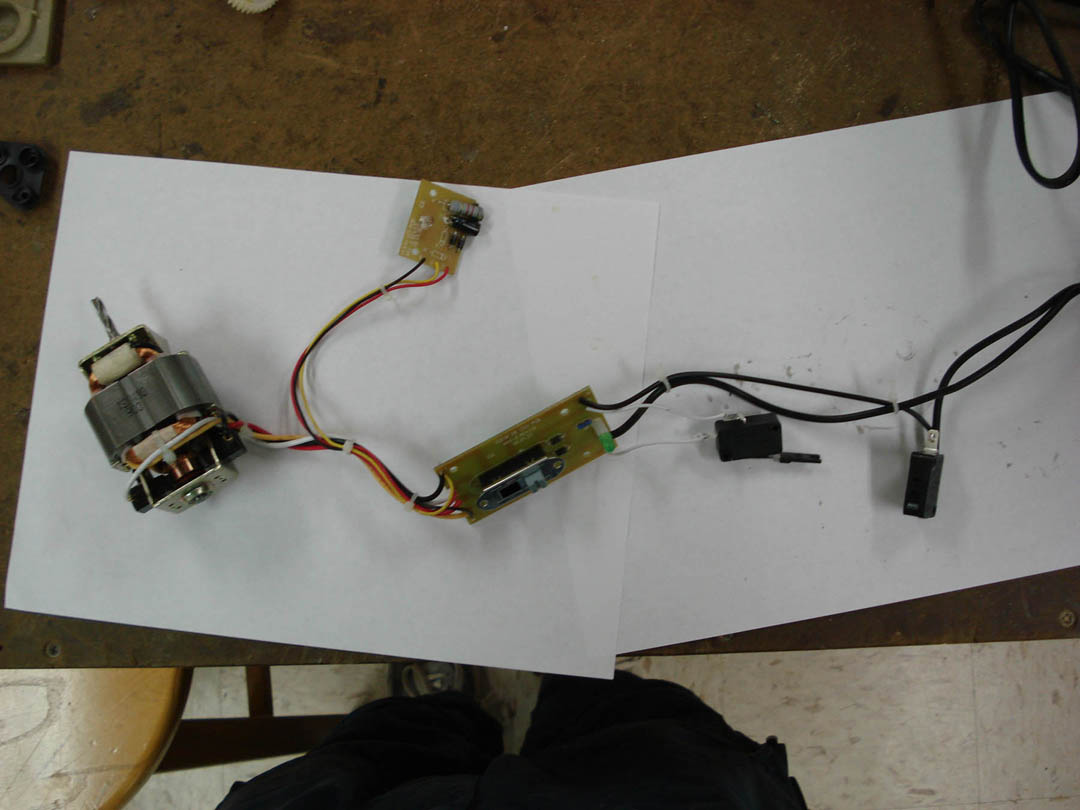
| - | There are three switches in the electrical circuit that must be activated to begin shredding. First, the shredder must be properly resting on the waste bin to toggle the safety switch, and then the off/auto/reverse switch that allows power to go to the shredder must be moved to "auto". Finally, the paper being put into the shredder compresses an air damper which trips the third switch and sends power to the [[ | + | There are three switches in the electrical circuit that must be activated to begin shredding. First, the shredder must be properly resting on the waste bin to toggle the safety switch, and then the off/auto/reverse switch that allows power to go to the shredder must be moved to "auto". Finally, the paper being put into the shredder compresses an air damper which trips the third switch and sends power to the [[Image:Electrical_&_Motor_Sub-assembly_(7).jpg|AC motor]]. The damper slowly depresses and when it is fully extended the switch is released, terminating the shredding process. The AC motor drives a gear train that reduces the speed of the shaft rotation and increases the torque. The first two gears are helical gears in order to reduce noise. At the end of the gear train, two spur gears are meshed and attached to individual shafts with cross-hatching blades. The blades are in a wave shape that cuts paper into the desired diamond shaped shreds. The blades spin in opposite directions and the paper is fed in between the spinning blades. The shredded paper falls into basket. |
==Media:== | ==Media:== | ||
Revision as of 18:06, 5 February 2007
Contents |
Purpose
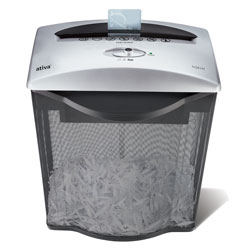
The purpose of this information page is to analyze in entirety all manufacturing and working aspects of a paper shredder. Following the analysis, what is deemed the most crucial of all possible modifications will be prototyped. Our analysis will take into account Design for manufacturing and assembly as well as user considerations.
Product Study and Dissection
Conventional and Unconventional Purposes:
Shreds paper or credit cards placed correctly into feeder
- Increase security - not able to easily retrieve information from shredded items
- Facilitate disposal - reduce volume of garbage
- Substitute for a recycling bin - provide a seperate container for paper wastes
- Produce confetti - save money on party decorations
Inputs/Outputs:
- Material Inputs: Paper, Staples, Credit Cards (no ties)
- Information Inputs: Direction of motor rotation
- Energy Inputs: 120V AC
- Material Outputs: Shredded material inputs
- Information Outputs: Operation status
- Energy Outputs: Heat, Noise, Light
Stake Holders:
- Possible outsourced companies (computer chips, bulbs, motor)
- Raw materials suppliers
- Retail stores
- Transportation workers
- Stock holders
Operation Procedures:
- If stored without power cord plugged into electrical wall outlet
- Position basket in desired place (making sure it is close to an outlet)
- Place shredder assembly on top of basket
- Confirm the off/auto/reverse switch is in the off position
- Plug power cord from shredder assembly into the wall outlet
- If stored in the off position or continuing from un-powered storage
- Set off/auto/reverse switch to auto
- Identify the items for shredding, confirming acceptable destruction
- Documents(s)
- Credit Card
- Confirm dimensions of items to be shredded
- There is not more than a thickness of 8 pieces of paper
- There is not more than one credit card
- Orient items for better control when feeding them into the shredder
- Align documents
- Fold/unfold documents
- Orient credit card to be fed long-ways
- Confirm that the “ready light” is illuminated
- Feed item into proper opening
- Position document(s) in proper groove
- Position credit card in proper slot
- Action following feeding
- Let go of document(s) once feeder has caught them, allowing them to be pulled through automatically
- Continue pressing credit card downwards until no longer possible
- If finished shredding, return to desired storage conditions
- If placing in desired storage area
- Turn off shredder
- Unplug power cord from wall outlet
- Pick up shredder assembly or shredder assembly and basket, placing it where desired
- If leaving in desired spot
- Can leave in auto position, off position, or off position with power cord unplugged from wall outlet
- If placing in desired storage area
Specific User Considerations:
- Certain tasks difficult for people with a neural disorder and/or coordination difficulty
- Feeding tasks
- Switch control
- Bending over to feed items difficult for individuals with orthopedic (e.g. back) and/or balance problems
- Inconvenient and inefficient for large corporate tasks
- Main shredder assembly is heavy and possibly difficult to lift for weaker individuals
- Main shredder assembly must be lifted when emptying basket and setting up
- Main shredder assembly may often be moved depending on storage preference
Functional Operation:
There are three switches in the electrical circuit that must be activated to begin shredding. First, the shredder must be properly resting on the waste bin to toggle the safety switch, and then the off/auto/reverse switch that allows power to go to the shredder must be moved to "auto". Finally, the paper being put into the shredder compresses an air damper which trips the third switch and sends power to the  . The damper slowly depresses and when it is fully extended the switch is released, terminating the shredding process. The AC motor drives a gear train that reduces the speed of the shaft rotation and increases the torque. The first two gears are helical gears in order to reduce noise. At the end of the gear train, two spur gears are meshed and attached to individual shafts with cross-hatching blades. The blades are in a wave shape that cuts paper into the desired diamond shaped shreds. The blades spin in opposite directions and the paper is fed in between the spinning blades. The shredded paper falls into basket.
Media:
For videos of user-trials and general operation, please visit the following: http://www.youtube.com/view_play_list?p=501153C70A89F93B
Components:
Modification Design:
Areas of Possible Improvement:
- Improved shredding capability for added security
- Rotary blade in which confetti is funneled into
- Pulp making apparatus
- Water jet (maybe acetone)
- Stirrer
- Decrease heat generation
- Fan and vents
- Wall-mounting capabilities
- Weight issues of shredder assembly which affect portability, sotrage, and emptying waste basket
- Use a lighter material than machined steel for main rods
- Titanium
- Plastic
- Composite
- Smaller motor
- Lighter blades
- Composite
- Titanium
- Use a lighter material than machined steel for main rods
- Decrease noise pollution of system
- Line shredder with sound-dampening material
- Foam
- Line shredder with sound-dampening material
- Improved feeding capabilities
- Large queue where can position multiple sheets that will automatically feed
- Examine a printer and fax feeder


