Storage Lift Sliding Bracket Assembly
From DDL Wiki
(Difference between revisions)
m |
m |
||
| Line 12: | Line 12: | ||
[[Image:Storag_Lift_Sliding_Bracket_Assembly_03.jpg|400px]] | [[Image:Storag_Lift_Sliding_Bracket_Assembly_03.jpg|400px]] | ||
| + | |||
| + | |||
| + | 4.) Insert 2 axles(11) through the sliding bracket(10) holes indicated below. | ||
| + | |||
| + | [[Image:Storag_Lift_Sliding_Bracket_Assembly_04.jpg|400px]] | ||
| + | |||
| + | |||
| + | 5.) Press fit 4 wheels(12) at each end of the now inserted axles(11). | ||
| + | |||
| + | [[Image:Storag_Lift_Sliding_Bracket_Assembly_05.jpg|400px]] | ||
| + | |||
| + | |||
| + | 6.) Tie white rope(29) around the curved portion of the U-Rod(15). | ||
| + | |||
| + | [[Image:Storag_Lift_Sliding_Bracket_Assembly_06.jpg|400px]] | ||
| + | |||
| + | |||
| + | Repeat steps 1-6 for the second sliding bracket assembly. | ||
Revision as of 14:08, 6 May 2007
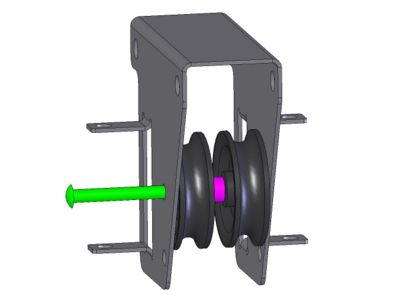
1.) Locate a spacer(18) between 2 pulley wheels(14) at the sliding bracket(10) hole indicated below. Feed, set and eject the 1.5" rivet pin(13).
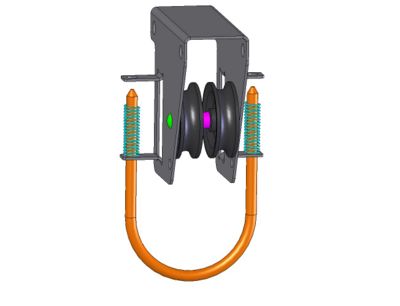
2.) Place 2 springs(16) at the inside of the lower tab of the sliding bracket(10). Position U-Rod(15) as shown, and slide through the lower tab, springs(16), and upper tab in that order.
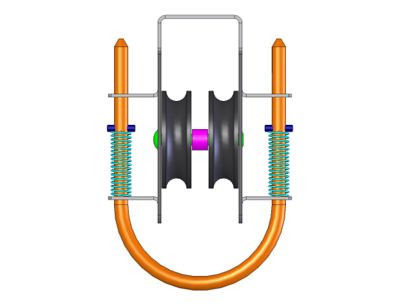
3.) Press fit 2 U-Rod Pins(17) through the U-Rod(15) holes until they are relatively centered.
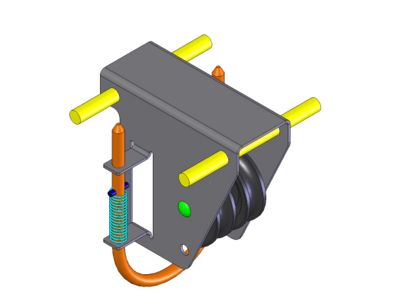
4.) Insert 2 axles(11) through the sliding bracket(10) holes indicated below.
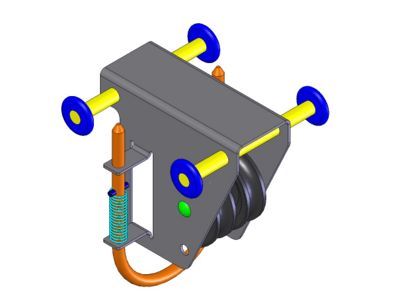
5.) Press fit 4 wheels(12) at each end of the now inserted axles(11).
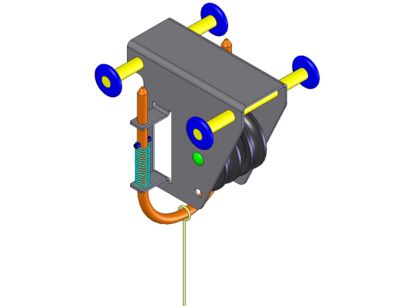
6.) Tie white rope(29) around the curved portion of the U-Rod(15).
Repeat steps 1-6 for the second sliding bracket assembly.
